
Planting
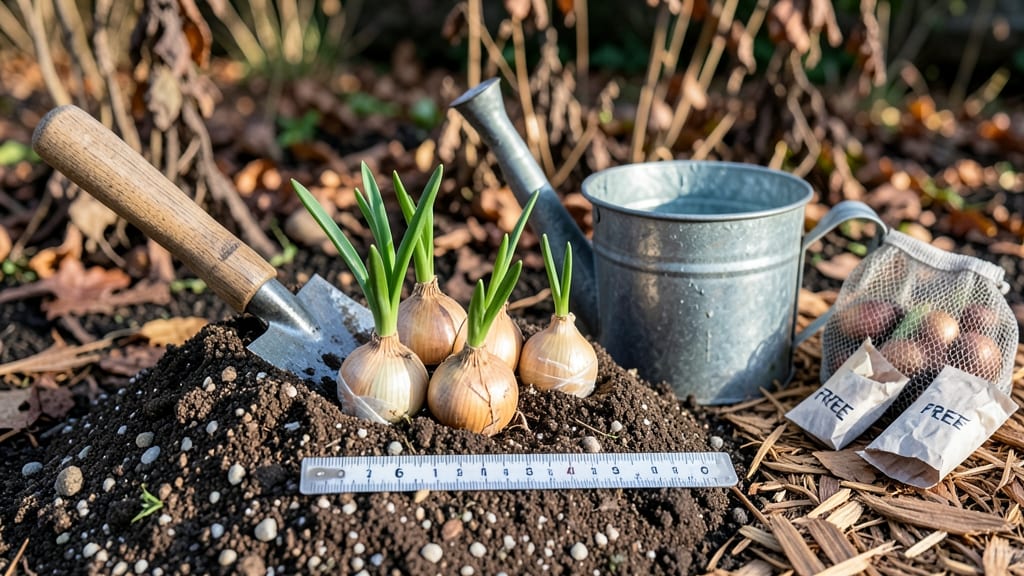
Caring for tulip bulbs isn't just about planting and forgetting—it's about giving them the right conditions to thrive year after year. 🌱 After struggling with tulips that faded after one season, I discovered the secret to vibrant blooms lies in consistent care, from soil prep to winter protection.
Most gardeners stop after planting, but the real work happens in the months before and after blooming. The magic starts with 6-8 inches of well-draining soil mixed with compost, planted at twice the bulb's height (so a 2-inch bulb goes 4 inches deep).
Water deeply after planting, then let nature take over—tulips hate soggy roots. In spring, fertilize lightly when shoots appear, but skip heavy feeding once blooms fade. The bulbs need time to recharge for next year.
What you'll end up with is a garden that pops with color year after year, not just one spectacular spring. The bulbs multiply naturally, creating dense patches of blooms that return reliably. Even in hot summers, they'll reward your care with stronger stems and bigger flowers.
This isn't just about pretty blooms—it's about building a low-maintenance perennial that comes back bigger every season. Let's get those bulbs thriving for years to come!
📚 In This Guide
- What you need
- Instructions
- Tips and common mistakes
- Wrapping up and next steps
What you need
- ● Tulip bulbs: Choose high-quality, firm bulbs (size 10-12 cm in circumference for best results). Quantity depends on your garden size—aim for 5-10 bulbs per square foot for a lush display.
- ● Well-draining potting mix or garden soil: A blend of 60% topsoil, 30% compost, and 10% sand or perlite works wonders. For containers, use a lightweight, well-aerated mix.
- ○ Garden fork or trowel: For digging planting holes (depth = 3x the bulb’s height). A bulb planter (optional but handy) can make this easier!
- ● Organic fertilizer: A balanced 10-10-10 or bulb-specific fertilizer (e.g., 5-10-10) to boost growth. Apply 1 tbsp per bulb at planting time.
- ● Mulch (straw, shredded leaves, or pine needles): 2-3 inches thick to insulate bulbs in winter and retain moisture.
- ● Watering can or hose with a gentle spray nozzle: Tulips hate soggy roots—aim for deep but infrequent watering (1 inch per week).
- ○ Garden twine or stakes (optional but helpful): For supporting tall varieties (e.g., Darwin Hybrid tulips) as they grow.
- ● Bulb fertilizer spikes: Slow-release nutrients for hassle-free feeding.
- ● Soil moisture meter: To monitor drainage and prevent overwatering.
- ● Frost cloth or row covers: For early spring protection in cold climates.
- ● Decorative stones or mulch rings: To keep mulch in place and add a polished look.
Step-by-Step instructions for year-round tulip bulb care
Here’s how I keep my tulips thriving through every season—no guesswork, just reliable blooms.
🌱 Step 1: Plant Bulbs at the Right Depth and Time
Tulip bulbs need 6-8 weeks of cold dormancy before spring blooms, so plant them in fall after the first frost when soil temps drop below 60°F. Dig holes 6-8 inches deep—about 3 times the bulb’s height—and space them 4-6 inches apart for small varieties, 8-12 inches apart for larger ones.
Place each bulb with the pointed end facing up (yes, it matters!). Cover with soil and water deeply to settle it in. I always add a 2-inch layer of mulch afterward to insulate the bulbs through winter. The key is timing: if you plant too early, bulbs may sprout and get fried by frost.
☀️ Step 2: Provide Sun and Water Through Spring Growth
Tulips thrive in full sun (6+ hours daily), but they’re tough enough to handle partial shade if your climate is hot. Water lightly after planting, then once a week during dormancy unless rain provides moisture. Once shoots emerge in spring, increase watering to 1 inch per week—bulbs need hydration to form next year’s blooms.
Stop fertilizing after the first flush of flowers fades. Overfeeding now encourages leafy growth at the expense of bulb energy storage. You’ll know you’re on track when leaves stay deep green and sturdy until they yellow naturally in late summer.
✂️ Step 3: Deadhead and Let Foliage Yellow Naturally
Snip off spent blooms right after they fade to redirect the bulb’s energy into next year’s flowers. But here’s the critical part: never cut the leaves until they turn completely yellow. Those leaves are the bulb’s food factory, and removing them too soon starves the bulb for winter.
I mark each spot with a small stake so I remember where bulbs are planted. Once leaves yellow in late June or July, let them die back naturally. This process takes 4-6 weeks, and rushing it weakens the bulb for next season.
🪴 Step 4: Mulch and Protect Through Summer Dormancy
After leaves die back, add a 2-inch layer of mulch (straw or shredded leaves work well) to keep soil cool and retain moisture. Tulip bulbs enter summer dormancy, so water only if your region has no rain for 3+ weeks. Overwatering now causes rot.
In hot climates, bulbs may push up shoots in summer—simply snip them off at the base. This prevents energy loss and keeps bulbs strong. By late August, they’ll start preparing for next year’s growth cycle.
⏰ Step 5: Prepare for Next Year’s Blooms in Early Fall
When soil temps drop to 60°F or below in fall, it’s time to plant new bulbs or divide clumps if needed. I always dig up and separate bulbs every 3-4 years to prevent overcrowding, which reduces flower size. Replant immediately in well-draining soil with compost mixed in.
Water deeply after planting, then mulch again. The cycle repeats—with patience, your tulips will reward you with vibrant blooms for a decade or more. The secret? Respect their dormancy needs and let nature do the rest.
Tips & tricks for perfect tulip bulb care
Here's what nobody tells you about keeping tulips thriving year after year—these little details make all the difference.
Timing is Everything: The 6-8 weeks of cold dormancy in Step 1 is non-negotiable. I've learned this the hard way—planting too early in fall can trigger premature sprouting that gets fried by frost. Use a soil thermometer to confirm temps are consistently below 60°F before planting. This ensures your bulbs get the proper chilling they need to bloom spectacularly next spring.
The Mulch Matters: That 2-inch layer of mulch after planting isn't just decoration—it's insulation. In my zone 5 garden, I've seen unmulched bulbs freeze back more severely in harsh winters. Use straw or shredded leaves (not fresh grass clippings) for best results. The mulch also helps regulate soil moisture during the dormant period, preventing both drought stress and waterlogging.
Visual Cues for Deadheading: When you're ready for Step 3, watch for these signs: the blooms should be fully open but starting to droop slightly. That's your cue to snip them off at the base. I always use clean, sharp scissors to avoid damaging the stem. The key is to remove spent blooms immediately—they steal energy from the bulb that could be going toward next year's flowers.
Summer Bulb Care Secret: Those summer shoots that sometimes pop up are actually the bulb's way of trying to bloom too early. Simply snip them off at the base—the bulb won't be harmed, and you'll prevent energy loss. This is particularly important in hot climates where bulbs might try to grow during their dormant period. By late August, your bulbs will be naturally preparing for next year's cycle.
Pro Tips for Tulip Bulbs Care
- Here's what nobody tells you about keeping tulips thriving year after year—these little details make all the difference.
- Timing is Everything: The 6-8 weeks of cold dormancy in Step 1 is non-negotiable. I've learned this the hard way—plan...
- The Mulch Matters: That 2-inch layer of mulch after planting isn't just decoration—it's insulation. In my zone 5 gard...
Frequently asked questions
Got questions about keeping your tulip bulbs thriving? You’re not alone! Here are answers to the most common concerns—from planting to overwintering—so you can grow stunning blooms year after year.
When is the best time to plant tulip bulbs?
Plant tulip bulbs in fall, 6–8 weeks before the first hard frost (typically October–November in most U.S. zones). This gives roots time to establish before winter. In warmer climates (zones 8–10), plant in late fall or winter to avoid summer heat stress. Aim for soil temps around 40–50°F (4–10°C) for ideal root growth.
Do tulip bulbs need winter care?
Yes! Tulips are hardy to zones 3–8, but they need cold dormancy to bloom. In mild winters (zones 7–8), mulch with 4–6 inches of straw or leaves to protect bulbs from freezing/thawing cycles. Avoid heavy mulch in colder zones—just let snow cover them naturally. No winter care? Bulbs may still survive but may bloom less reliably.
Why did my tulip bulbs not come back after flowering?
Tulips are perennial but often treated as annuals because they decline after blooming. Common reasons for no regrowth:
- Improper storage: Bulbs left in hot, dry soil over summer die. Solution: Dig and store bulbs in a cool (40–50°F), dry place (like a garage) until fall replanting.
- Overcrowding: Bulbs need space. Solution: Divide clumps every 3–4 years in late summer.
- Pests/disease: Squirrels, voles, or fungus can damage bulbs. Solution: Use bulb cages or nematode-resistant varieties.
Can I grow tulips in containers?
Containers are great for small spaces or renters. Use a well-draining pot (at least 8 inches deep) with a mix of potting soil and sand/perlite. Plant bulbs close together (2–3 inches apart) and place in a shady spot in summer to mimic dormancy. Water sparingly after blooming to encourage bulb rest.
How do I revive tired tulip bulbs?
If your tulips are weak or sparse, try these fixes:
- Fertilize: Use a balanced bulb fertilizer (10-10-10) in fall and a low-nitrogen feed in spring (like 5-10-10) to boost blooms.
- Improve drainage: Tulips hate soggy soil. Amend heavy clay with compost or grit.
- Deadhead & feed: Remove spent blooms to redirect energy to bulbs. Add bone meal (3-12-0) in fall for next year’s growth.
Are there tulip varieties that return every year?
Some tulips are more reliable perennials than others. Try these “come-back” varieties:
- Darwin Hybrids (e.g., ‘Apeldoorn’, ‘Queen of Night’)
- Fosteriana (e.g., ‘Yellow Emperor’—early bloomers)
- Kaufmanniana (e.g., ‘Ice Cream’—compact and hardy)
These varieties store energy better and often naturalize (spread) over time. Pro tip: Plant them in full sun with well-draining soil for best results!
Wrapping up and next steps
Growing stunning tulips starts with caring for their bulbs—whether you're a seasoned gardener or just starting out! With the right soil, sunlight, and timing, your tulips will reward you with vibrant blooms year after year. Remember, patience and consistency are key, so don’t rush the process.
Ready to transform your garden? Start by planting your bulbs this fall—your future tulip showstopper awaits! 🌷✨