
How To
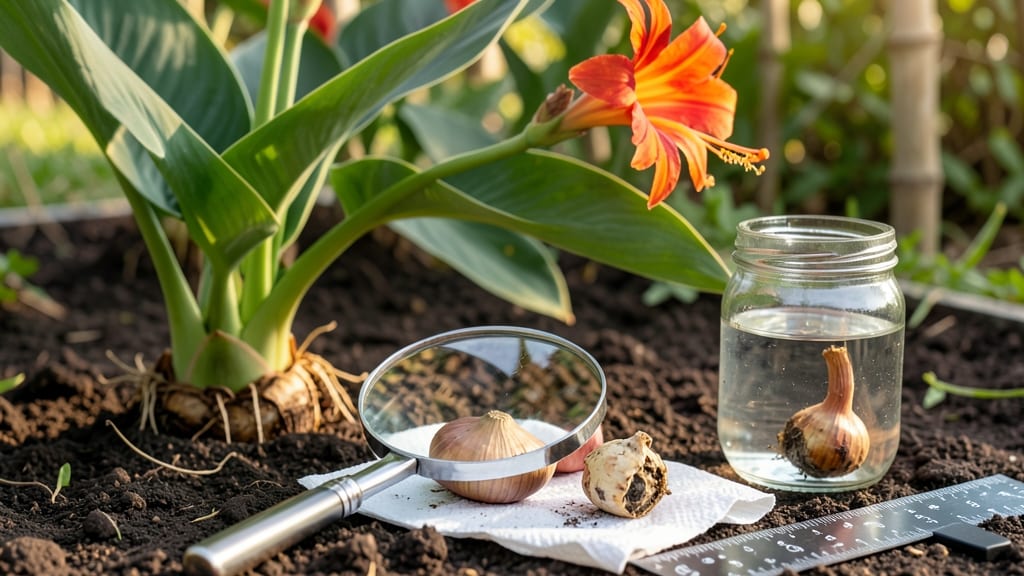
How to tell if canna bulbs are dead can be tricky—they might look lifeless but still hold surprises for next season. The squeeze test and root check reveal all. 🌱 I've dug up my share of seemingly lifeless cannas only to find they were just taking a long winter nap—until I learned these simple tricks to tell the difference. Start by gently squeezing the bulb between your fingers. A healthy one feels firm with a slight give, like a ripe avocado. If it's mushy, squishy, or crumbles like stale bread, it's time to compost it. For bulbs that feel dry and papery, check the roots—healthy ones are firm and pale, while rotten ones smell funky and turn dark brown or black. The real game-changer is patience. Some bulbs stay dormant for months, especially in cooler climates. Plant the firm ones anyway—they'll often bounce back with vibrant foliage by summer. Even my black thumb has revived cannas this way. This method works for both in-ground and container gardeners. Just remember: when in doubt, plant it out. Nature has a way of surprising us.
Root Causes of Bulb Failure
Understanding why canna bulbs die helps you prevent future losses and revive struggling plants. Here’s a breakdown of the most common reasons—each tied to specific biological or environmental triggers.
---
Canna bulbs are tropical plants, meaning they thrive in warmth but are highly sensitive to freezing temperatures and heatwaves. When exposed to conditions outside their ideal range (typically 60–90°F), their metabolic processes shut down.
- Cold Damage (Below 32°F): Water inside the bulb’s cells expands into ice crystals, rupturing cell walls. This causes browning or blackening of the bulb and a mushy texture when pressed. Even a single freeze can kill dormant bulbs if they’re not protected.
- Heat Stress (Above 95°F for Prolonged Periods): High temperatures accelerate respiration (the bulb’s energy-burning process), depleting stored nutrients faster than they can be replenished. Over time, this leads to premature sprouting failure or root rot if paired with poor drainage.
Actionable Fix: 🌡️ Mulch heavily in winter, use frost blankets, and ensure bulbs are planted in well-draining soil to avoid waterlogging in heat.
---
Canna bulbs need consistent moisture but are equally vulnerable to overwatering and drought stress. Both extremes disrupt the bulb’s ability to absorb nutrients and transport water.
- Overwatering & Root Rot: Canna bulbs store starches in their corms (the swollen underground stem). When soil stays soggy, anaerobic bacteria thrive, leading to soft, foul-smelling bulbs with blackened roots. The classic "squeeze test" will reveal a gelatinous, collapsing interior.
- Underwatering & Desiccation: Bulbs rely on stored moisture to sustain growth. Prolonged dryness causes the corm to shrink and harden, and the outer layers may crack. Once the bulb’s water reserves are exhausted, it cannot recover without immediate rehydration.
Actionable Fix: 💧 Water deeply but infrequently—aim for 1–2 inches of soil moisture per week. Use a moisture meter or stick your finger 2 inches into the soil before watering.
---
Canna bulbs are targets for insects, fungi, and bacteria that exploit weak or damaged tissue. Once infected, the bulb’s internal structure degrades rapidly.
- Common Culprits: - Canna Rust (Puccinia spp.): Fungal spores create orange pustules on leaves, weakening the plant until it can’t support the bulb’s energy needs. - Canna Leaf Roller (Ctenopseustis spp.): Larvae burrow into stems, starving the bulb by disrupting nutrient flow. - Bulb Mites (Rhizoglyphus spp.): Tiny pests burrow into the corm, creating tunnels and feeding scars that prevent sprouting.
- Bacterial Soft Rot (Erwinia spp.): A bacterial infection causes watery, foul-smelling decay inside the bulb. Infected bulbs often collapse when removed from the soil.
Actionable Fix: 🛡️ Rotate crops annually, remove infected foliage immediately, and treat soil with neem oil or copper fungicide before replanting.
---
Canna bulbs go through natural dormancy cycles, typically in late fall/winter. If disturbed during this period, they may fail to regrow or sprout prematurely and die from cold stress.
- Forced Early Sprouting: Planting bulbs too early in cool climates tricks them into breaking dormancy prematurely. If a frost hits, the tender new shoots freeze and rot, killing the bulb from the inside out.
- Improper Storage Conditions: Stored bulbs need cool (50–60°F), dry, and dark conditions. High humidity or temperature fluctuations cause mold growth or premature sprouting, draining the bulb’s energy reserves.
Actionable Fix: ⏳ Wait until after the last frost to plant. Store bulbs in a paper bag with dry peat moss in a cool garage or basement.
--- Canna bulbs require phosphorus and potassium for root and corm development. A lack of these nutrients stunts growth, making bulbs smaller, weaker, and more susceptible to disease.
- Symptoms of Deficiency: - Yellowing leaves (chlorosis): Indicates nitrogen or magnesium issues, but severe cases can weaken the bulb’s structure. - Stunted shoots: A sign of phosphorus deficiency, which directly impacts root and bulb formation. - Purple stems: A classic potassium deficiency, leading to cell membrane breakdown and bulb decay.
Actionable Fix: 🌿 Use a balanced fertilizer (10-10-10) at planting and a potassium-rich supplement mid-season. Test soil pH—cannas prefer 6.0–7.0.
--- Accidental harm—like rough handling, improper planting depth, or mechanical injury—can seal a bulb’s fate.
- Cut or Bruised Bulbs: Even a small nick exposes the corm to pathogens and rot. If the damage affects the growing eye (the small bump where shoots emerge), the bulb may never sprout.
- Planting Too Deep or Shallow: - Too deep: Restricts oxygen flow, causing anaerobic conditions and suffocation. - Too shallow: Exposes the bulb to temperature swings and drought stress.
Actionable Fix: 🔨 Plant bulbs 2–3 inches deep with the growing eye facing upward. Handle bulbs gently—never force them into the soil.
Revive Your Cannas: Step-by-Step Fixes
If your canna bulbs are looking lifeless, don’t toss them just yet! With the right care, you can often bring them back to life.
Below, we’ve mapped out practical solutions based on the most common causes of bulb decline—from rot to dormancy—along with prevention tips to keep your cannas thriving for years to come.
If your bulbs feel mushy, smell foul, or have blackened roots, they’re likely suffering from overwatering or fungal/bacterial rot. Here’s how to save them:
#### 🍳 Step 1: Remove and Inspect the Bulb - Gently dig up the bulb and rinse off soil to assess the damage. - Trim away any soft, discolored, or slimy sections with sterilized pruning shears (wipe with rubbing alcohol between cuts). - If the bulb is mostly firm with only a small rotten spot, it’s worth saving! #### 👨🍳 Step 2: Disinfect and Dry - Soak the bulb in a 1:10 hydrogen peroxide solution (3% strength) for 10–15 minutes to kill pathogens. - Let it air-dry in a shady, well-ventilated spot for 2–3 days. Avoid direct sunlight, which can cause further stress. #### 🥘 Step 3: Repot in Fresh, Dry Soil - Use a well-draining potting mix (add perlite or sand if your soil is heavy). - Plant the bulb at the same depth as before, ensuring the top remains exposed. - Water sparingly for the first week—only enough to moisten the soil, not soak it. #### ⏰ Step 4: Monitor and Adjust - Place the pot in bright, indirect light (no harsh sun yet). - Wait 2–4 weeks before resuming normal watering. If new growth appears, you’re on the right track! > 💡 Pro Tip: To prevent future rot, never let bulbs sit in soggy soil. Elevate pots slightly or use saucers with drainage holes.If your bulbs are shriveled, dry, or have no signs of life, they may be dormant or simply thirsty. Follow these steps to coax them back:
#### 🔥 Step 1: Check for Dormancy - Cannas go dormant in winter (especially in colder climates). If it’s off-season, they may just need time. - Test for dormancy: Press gently—if the bulb feels hard and leathery with no soft spots, it’s likely just resting. #### 🍎 Step 2: Soak and Rehydrate - Place the bulb in a bucket of lukewarm water for 6–12 hours to rehydrate. - Avoid hot water, which can shock the bulb. #### 🌱 Step 3: Plant in Warmth - Repot in warm, well-draining soil (ideal temp: 70–80°F). - Water lightly and place in a sunny spot (but avoid cold drafts). - If planted outdoors, wait until soil temps are above 60°F before transplanting. #### 🎯 Step 4: Encourage Growth - Fertilize lightly with a balanced, water-soluble fertilizer (diluted to half strength) once new shoots appear. - Keep soil consistently moist (not soggy) until the plant establishes roots. > 🔥 Pro Tip: If your climate has harsh winters, dig up bulbs before frost and store them in a cool, dry place (like a garage) until spring.If bugs, mold, or mildew are to blame, act fast to save your bulbs:
#### 🐛 Step 1: Identify the Problem - Common culprits: Canna rust, fungal spots, or bulb mites. - Signs: Yellowing leaves, black spots, or tiny webs on the bulb. #### 🧼 Step 2: Treat the Bulb - For fungal issues: Dust with neem oil or sulfur (follow label instructions). - For pests: Spray with insecticidal soap or horticultural oil. - For severe cases: Soak the bulb in a fungicide solution (like copper fungicide) for 30 minutes. #### 🌱 Step 3: Isolate and Repot - Keep the treated bulb separate from healthy plants for 2 weeks. - Use sterilized pots and soil to prevent reinfection. > ✨ Pro Tip: Prevent future issues by: > - Rotating crops (don’t plant cannas in the same spot yearly). > - Cleaning garden tools with rubbing alcohol after use. > - Avoiding overhead watering to reduce fungal spores.If your cannas were exposed to frost, the bulb may have suffered cold damage. Here’s how to assess and recover:
#### 🔍 Step 1: Assess the Damage - Light freeze? The bulb may look wrinkled but still firm. - Severe freeze? It could be blackened or mushy inside. #### 🔥 Step 2: Cut Away Damaged Areas - Slice off any blackened or squishy sections with sterilized shears. - If the core is still firm, the bulb may regrow. #### 🌱 Step 3: Encourage Regrowth - Plant in warm, fertile soil and keep it consistently moist. - Place in a sheltered, sunny spot (like a greenhouse or indoors near a sunny window). - Be patient—new growth may take 4–6 weeks. > 💡 Pro Tip: Protect bulbs in winter by: > - Mulching heavily (4–6 inches of straw or leaves). > - Covering with burlap if frost is expected. > - Moving potted cannas indoors before temps drop below 50°F.With these fixes, most canna bulbs can bounce back—even if they looked hopeless at first! The key is acting quickly, providing the right conditions, and preventing future stress. Happy gardening! 🌿🌸
Frequently asked questions
What does a healthy canna bulb feel like when I squeeze it?
A healthy canna bulb should feel firm with a slight give, like a ripe avocado. If it feels mushy, squishy, or crumbles easily, it's likely dead from rot. A hard and papery texture might indicate dormancy rather than death—give it time or try rehydrating it.
Can I still plant a canna bulb if it has black spots?
It depends! If the black spots are only on the surface and the inside feels firm, you can trim away the damaged areas with sterilized shears and replant it. But if the blackness extends deep into the bulb or it smells foul, it's better to compost it to prevent spreading disease to other plants.
How can I tell if my canna bulb is dormant vs. dead?
Dormant bulbs feel hard and leathery with no soft spots, while dead ones are mushy, hollow, or crumble easily. Try soaking a hard bulb in lukewarm water for 6-12 hours—if it plumps up slightly, it's likely just dormant. Place it in warm, well-draining soil and wait for signs of new growth.
What should I do with bulbs that smell bad when dug up?
Foul smells mean the bulb has bacterial or fungal rot—don't replant it! Instead, compost the bulb (if your compost pile gets hot enough) or dispose of it in the trash. Soak healthy bulbs in a 1:10 hydrogen peroxide solution for 10-15 minutes before replanting to prevent future infections.
Will canna bulbs regrow after being frozen?
Sometimes! If only the outer layers are damaged, cut away any blackened or mushy sections and replant the firm core. Place it in warm, protected conditions (like a greenhouse) and keep soil consistently moist. New growth may take 4-6 weeks, but don't give up—some bulbs surprise you!